
Get the right access first
Use a Google account your business can keep access to. If someone already set up Search Console for the website, ask its owner to add your Google account through Settings → Users and permissions. Do not share passwords.
For a new setup, you will need access to the domain’s DNS settings or your website’s verification settings. Your website person can help with that part. You do not need to create a Google Cloud project or buy an API key to follow this guide.
Add your website and choose a property type
Open Google Search Console and sign in. Use the website selector to choose Add property. If Google asks what you are adding, choose a website. A “property” is simply the website address or domain you want to check.
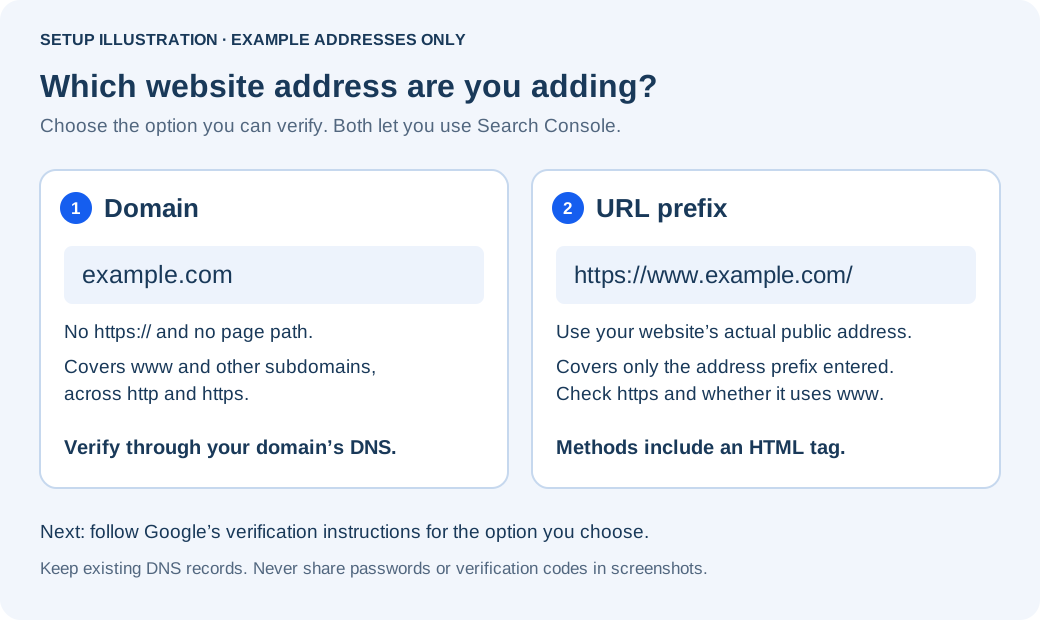
Open your homepage and check the final address before choosing URL prefix. https://example.com/ and https://www.example.com/ are different prefixes. Choose the option you can verify; neither is a shortcut to better rankings.
| Choose | What to enter | When it fits |
|---|---|---|
| Domain | example.com — no https:// or page path | Covers the domain, including www, other subdomains and http/https. Requires DNS verification. |
| URL prefix | https://www.example.com/ — use your actual public address | Covers only that address prefix. Offers other verification methods, including an HTML tag. |
 Open larger image ↗
Option A: verify through your domain’s DNS
Add the new record; do not delete existing records or change nameservers. If you are unsure which settings to use, ask your website person.
Copy the record Google provides.
Use the exact record in Google’s verification window, usually TXT.
Add it at your DNS provider.
Add the record in your DNS settings. Follow your provider’s Host/Name instructions.
Save, then select Verify in Google.
Updates can take time. Keep the record after success.
Option B: verify with an HTML tag
This proves ownership; it is not a visitor tracker. Signal Analytics uses a separate verification tag. Do not use one in place of the other.
Choose HTML tag for your URL-prefix property.
Copy Google’s entire meta tag.
Publish it in your homepage’s <head>.
Use your website builder’s verification or header-code setting, not a visible text block.
Return to Google and select Verify.
Keep the tag after verification.
If verification does not work
You are done with this part when Google confirms ownership and you can open the property. That does not mean every page is indexed. New search figures can take a few days to appear; check the property address before treating an empty chart as a problem.
- DNS record not found: updates may take time.
- HTML tag not found: check its published location.
- Domain property: use DNS, not HTML tag verification.
- Already managed by someone else: ask the owner for access.
Optional: tell Google about your sitemap
A sitemap is a file listing pages on your website. Your website builder may already create or submit it. Ask your website person for its actual URL rather than assuming every site uses /sitemap.xml.
A successful submission means Google could process the sitemap, not that every listed page is indexed. It does not guarantee rankings. This step happens in Google; AI Search Signal’s read-only connection does not submit sitemaps or request indexing.
Open the sitemap’s public URL.
Check that it opens without a login.
Open Sitemaps in Google Search Console.
With owner access, submit that sitemap URL and read the returned status. Open any error for details.
Next: see the numbers in AI Search Signal
The connection is included with Starter, Growth and Business. It does not edit your website or change report scores. No Signal Analytics tracking script is needed for Search Console.
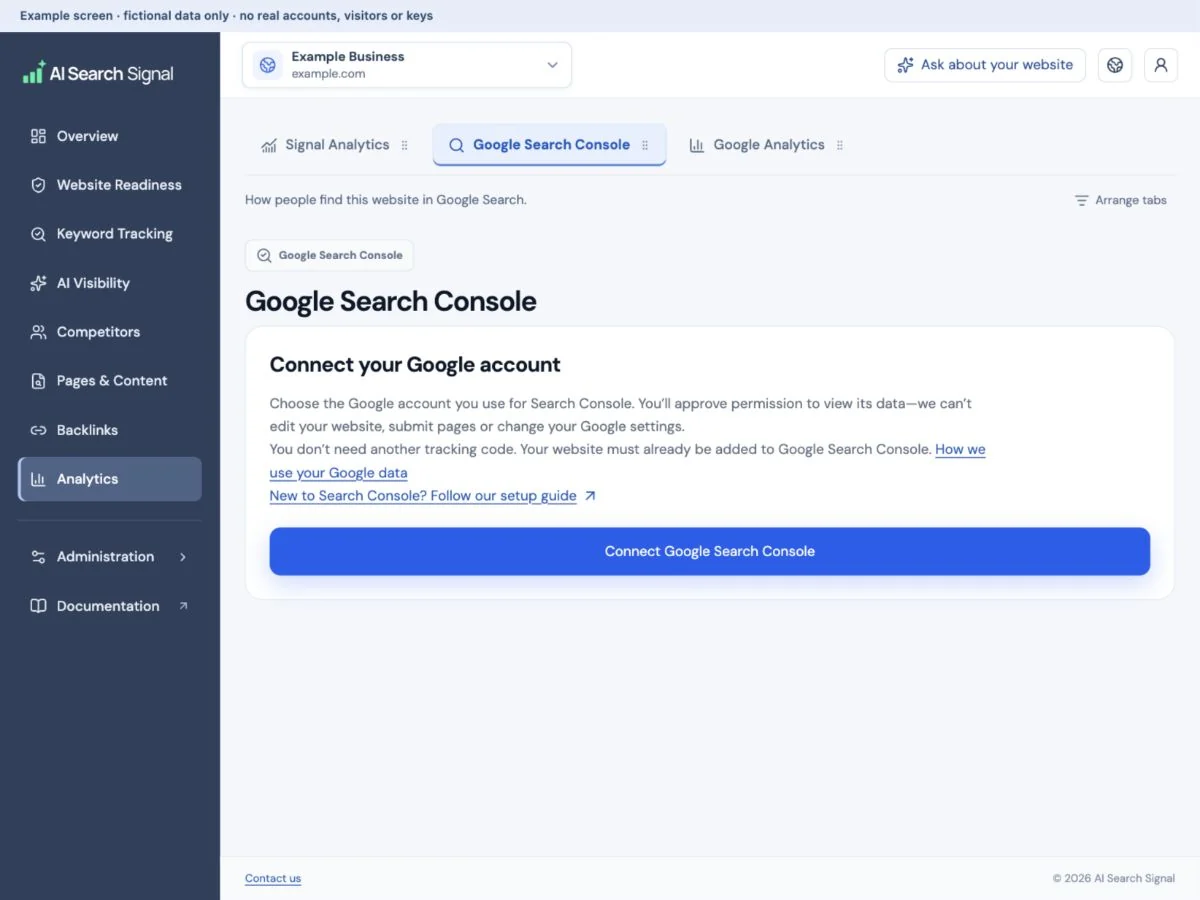
Open Analytics → Google Search Console.
In your AI Search Signal dashboard, select Connect Google Search Console.
 Open larger image ↗
Example screen Connect Google in the Overview setup tile opens these settings. Use the Google account with access to the selected website’s property. This example contains no real Google account details. Use the Google account with property access.
Approve the read-only connection and choose the matching website. This Google account may differ from your AI Search Signal sign-in email.
Choose 7, 30 or 90 days.
Read the available figures. An empty period does not create missing history, and reconnecting does not make Google’s data arrive sooner.
Useful links
Product documentation prepared with AI assistance and checked against the current application. If a step no longer matches your dashboard, let us know. Do not send passwords or connection keys.