
Connect the account that manages the property
Not using Search Console yet? Start with our setup guide to add your website and verify ownership with Google. Then return here to connect it.
Choose your website and open Google setup.
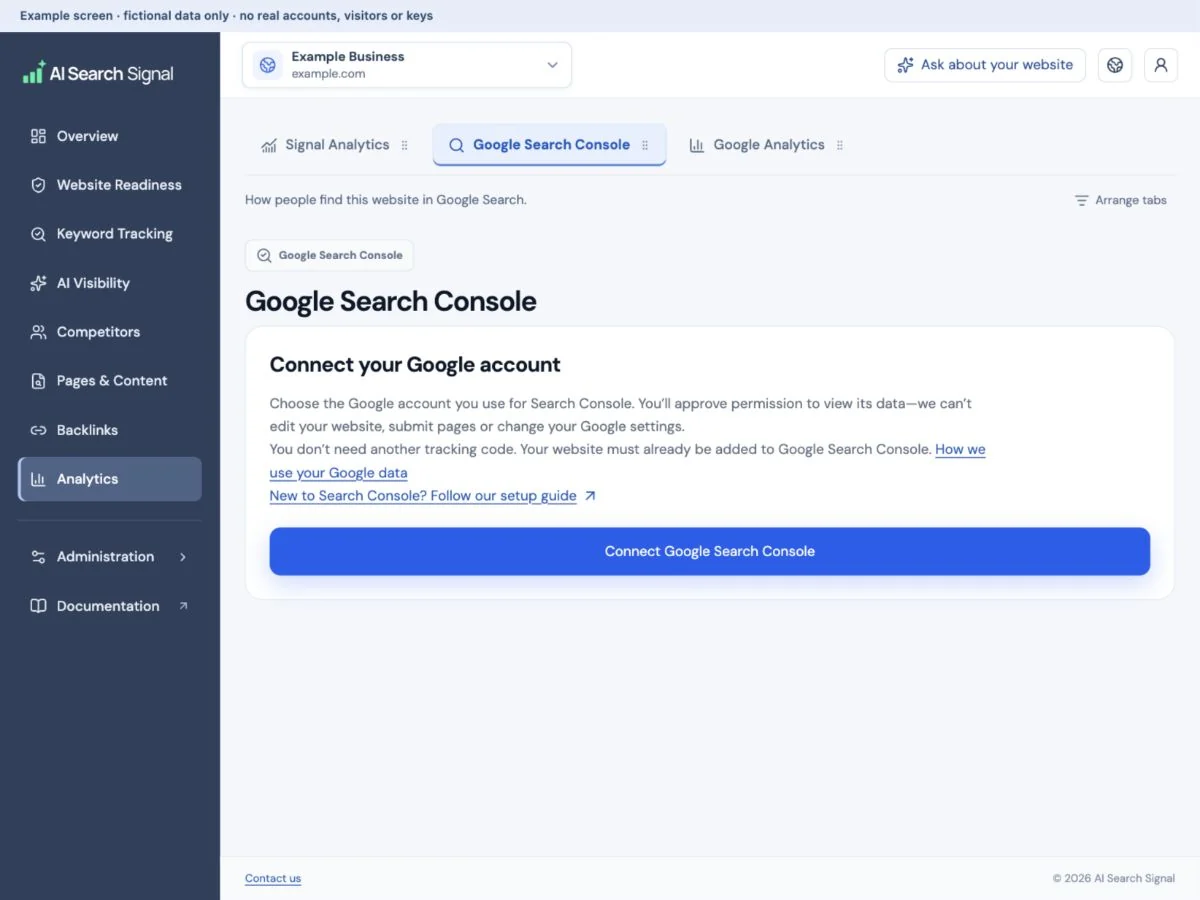
In Overview, select Connect Google on the Google Search Console setup tile. You can also open Analytics → Google Search Console and its connection settings. Sign in to the Google account that can see this website in Search Console; it may not be the email used for your AI Search Signal account.
 Open larger image ↗
Example screen Connect Google in the Overview setup tile opens these settings. Use the Google account with access to the selected website’s property. This example contains no real Google account details. Review Google’s permission screen.
Approve the read-only connection if you want to continue. It lets this dashboard read search information, not edit your website, change Google settings or submit pages for indexing.
Choose the matching website property.
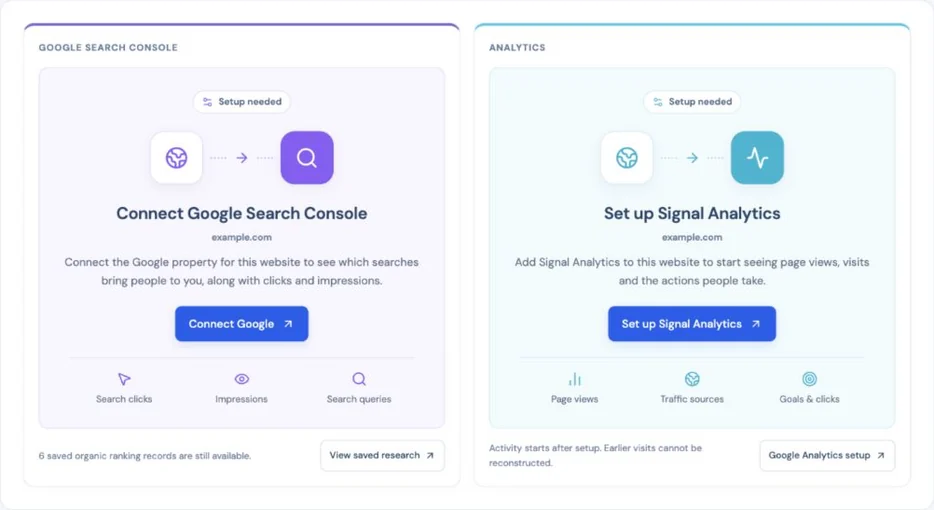
Choose the saved business in the main website selector. Overview follows that website and shows matching connected Google data. If it shows Finish Google setup, open the connection settings and choose a property covering the selected website. If several properties cover that site, the Search Console connection controls let you choose another matching property. Changing a property does not switch your saved business. If no properties are listed, check which Google account you connected and whether the property has been added and verified in Google Search Console.
 Open larger image ↗
Choose a period and read the trend
Selecting 7, 30 or 90 days loads the selected period automatically and shows a loading state. Refresh data requests updated figures for that selection. A saved period and a new refresh are not the same thing.
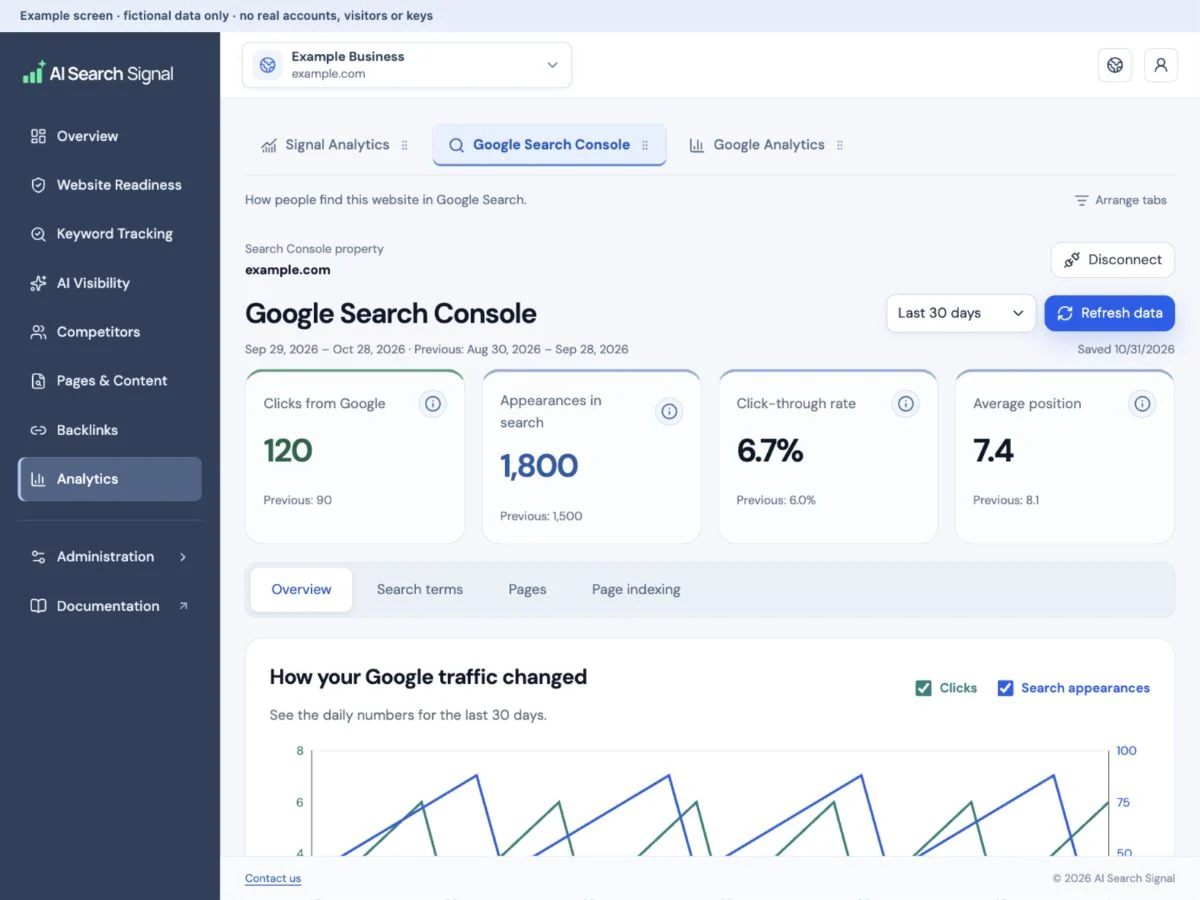
In Analytics → Google Search Console → Overview, the chart can show clicks and search appearances together. The main dashboard Overview uses a compact search-impressions chart. Clicks are green and search appearances (impressions) are blue. Both key checkboxes start selected; hide either line if you want a simpler view. A click means someone selected your Google result. A search appearance means the result was shown, not that someone visited the website.
These are Google measurements, not your Signal Analytics visit totals. They may cover different dates, privacy choices and activity. Google’s API can return a limited set of rows, so a missing query or page is not proof of zero activity.
 Open larger image ↗
Use the tabs to answer one question at a time
The green click line and blue impression line can use different vertical scales. Read the axis labels instead of comparing their heights as if they used the same unit. A change tells you what happened in the returned data, not why. Check the dates and page details before deciding that a website edit, competitor or algorithm caused it. Search Console data stays separate from your report scores.
- Overview: follow the trend for the selected period.
- Search terms: find queries gaining or losing clicks compared with the previous period.
- Pages: search for a page, review changes and open its saved details.
- Page indexing: review known URLs and the latest saved inspection status.
Check known pages without treating the list as the whole website
The known-page list combines URLs found in sitemaps, saved scans and Google results. It can still be incomplete. Use Check all known pages to start the read-only checks shown in that tool, then follow progress and each page’s status.
Not checked, unavailable and an inspection failure are not the same as “not indexed.” Read the saved check date and details, including Google’s canonical choice when available. This dashboard uses Google’s indexed-page information; it does not perform a live page test or ask Google to index the URL. Google’s limits can affect how many checks complete.
If the connection stops working
Check the displayed error and use the reconnect option if access has expired or been withdrawn. If you connected the wrong account, use the account-choice option or disconnect and connect again. Do not create another paid website scan to fix a Google login problem.
Disconnect removes the connection and its saved Search Console data from this dashboard. It does not delete the Google property or alter report scores. Read the confirmation before proceeding.
Useful links
Product documentation prepared with AI assistance and checked against the current application. If a step no longer matches your dashboard, let us know. Do not send passwords or connection keys.